License Agreement: By following this tutorial you are agreeing to the following license agreement.

Permission is hereby granted, free of charge, to any person obtaining a copy of this software and associated documentation files (the “Software”), to deal in the Software without restriction, including without limitation the rights to use, copy, modify, merge, publish, distribute, sublicense, and/or sell copies of the Software, and to permit persons to whom the Software is furnished to do so, subject to the following conditions:

The above copyright notice and this permission notice shall be included in all copies or substantial portions of the Software.

THE SOFTWARE IS PROVIDED “AS IS”, WITHOUT WARRANTY OF ANY KIND, EXPRESS OR IMPLIED, INCLUDING BUT NOT LIMITED TO THE WARRANTIES OF MERCHANTABILITY, FITNESS FOR A PARTICULAR PURPOSE AND NONINFRINGEMENT. IN NO EVENT SHALL THE AUTHORS OR COPYRIGHT HOLDERS BE LIABLE FOR ANY CLAIM, DAMAGES OR OTHER LIABILITY, WHETHER IN AN ACTION OF CONTRACT, TORT OR OTHERWISE, ARISING FROM, OUT OF OR IN CONNECTION WITH THE SOFTWARE OR THE USE OR OTHER DEALINGS IN THE SOFTWARE.

Disclaimer: Do not use this to scam people or to impersonate any person. It is ok to use this software to joke around with friends and I will not be held responsible for any illegal or other misuse of this technology. It is also morally wrong to use this software to manipulate others emotions. Do NOT do this. I wrote this article to help protect people from Deep Fakes by showing how easily it can be done.
In this article I show how to do an AI identity change including face and audio. Below are separate demos for video and audio because the laptop I wrote this on can’t handle both at once. Once I can access my desktop 3090 I will update this to combine both at once. Neither the face nor the audio are flawless and you will need to do some tuning – discussed in another article. The purpose of this article is to teach you how to setup all required software.
Tutorial Outline
- Assumptions
- Prerequisites
- Install and Configure DeepFaceLive
- DeepFace Live sub steps
- Update Graphics Drivers from NVidia website
- Change Virtual Memory to 32 GB
- DeepFace Live sub steps
- Connecting DeepFaceLive output to OBS Studio
- Install and Configure RVC GUI
- Join AI Hub Discord and download Voice model
- Configure Audio Setup for Discord Input
- Advanced audio processing and feedback
Assumptions
When I set this up I was using Windows 11 and an NVidia 3050 graphics card on an MSI Katana GF76 11UD gaming Laptop. The links for the required software are available for other platforms as well. I assume that you have python 3.10 and pip installed on your machine.
Prerequisites
You will need a quality microphone and a pair of headphones to be able to make this work without your voice bleeding through and without feedback running through your model. A Yeti microphone is good enough and any headset will do. You should also have at least an Nvidia 3050 graphics card or higher. If you plan on doing both the video and audio you will need at least an Nvidia 3090 graphics card.
You will need to install OBS Studio to be able to connect the output of DeepFaceLive to video conferencing software such as Zoom or Discord.
Install and Configure DeepFaceLive
Deep Face Live is pretty easy to install but not necessarily easy to use because it includes a lot of steps to configure within the software itself. It is also a bit tricky to download the software because you have to install another download manager. Start by increasing the virtual memory on your PC to 32 GB. Once you’ve increased your virtual memory to 32 GB, navigate to the release page of DeepFace and click on the Mega.nz link which will take you to the page shown in the screenshot below.
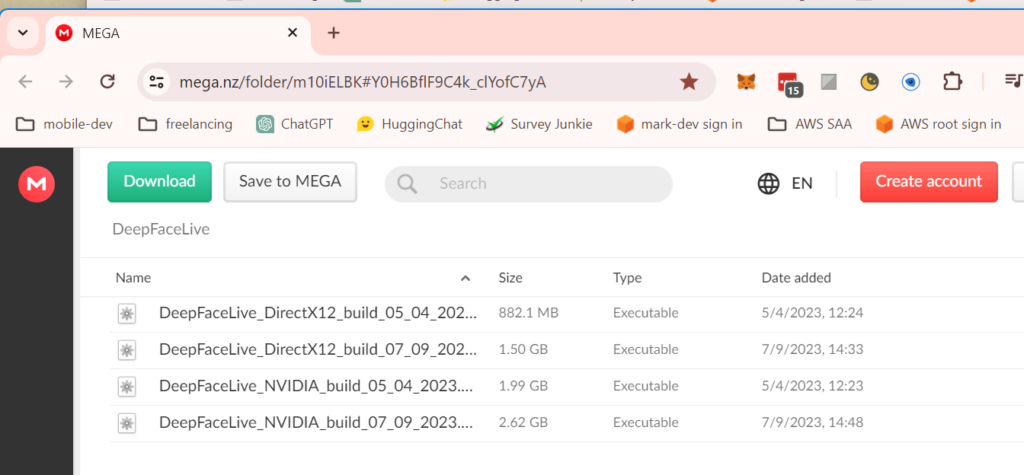
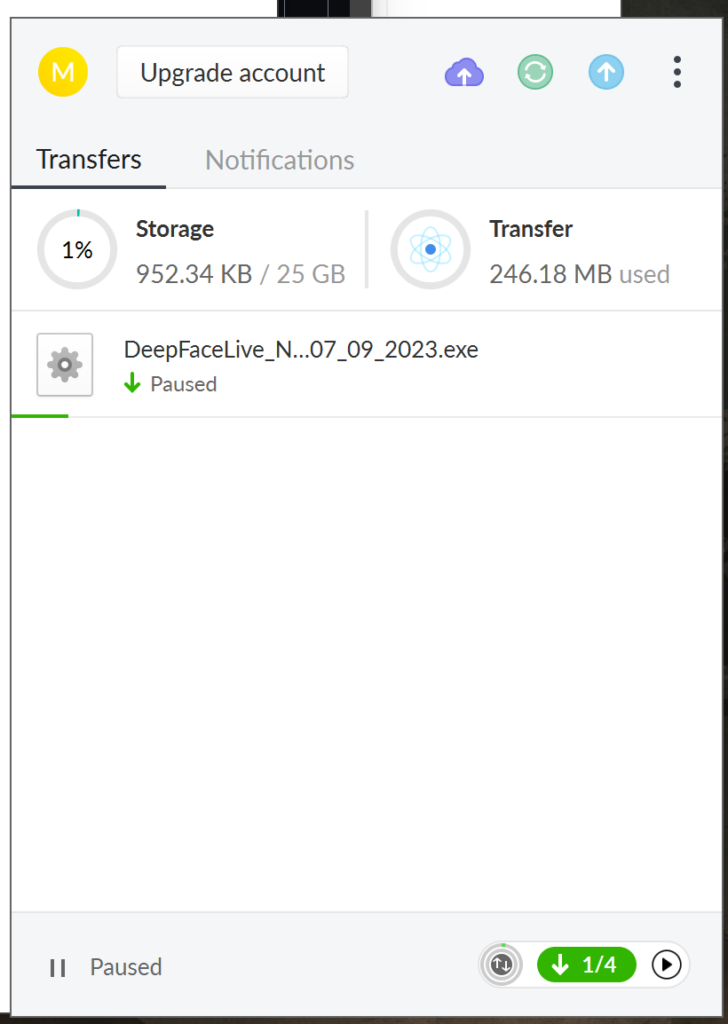
Before downloading, you will need to create an account on Mega and then download and install the Mega File downloader. You should then be able to download the “DeepFaceLive_NVIDIA_build_{date}” file using the download manager as shown.
Extract into the root of any disk – ideally your fastest SSD drive (probably C:). The file will be extracted into a folder called “C:\DeepFaceLive_NVIDIA” and then you can just double click “DeepFaceLive.bat” which will launch the program. You should launch into something that looks like this:
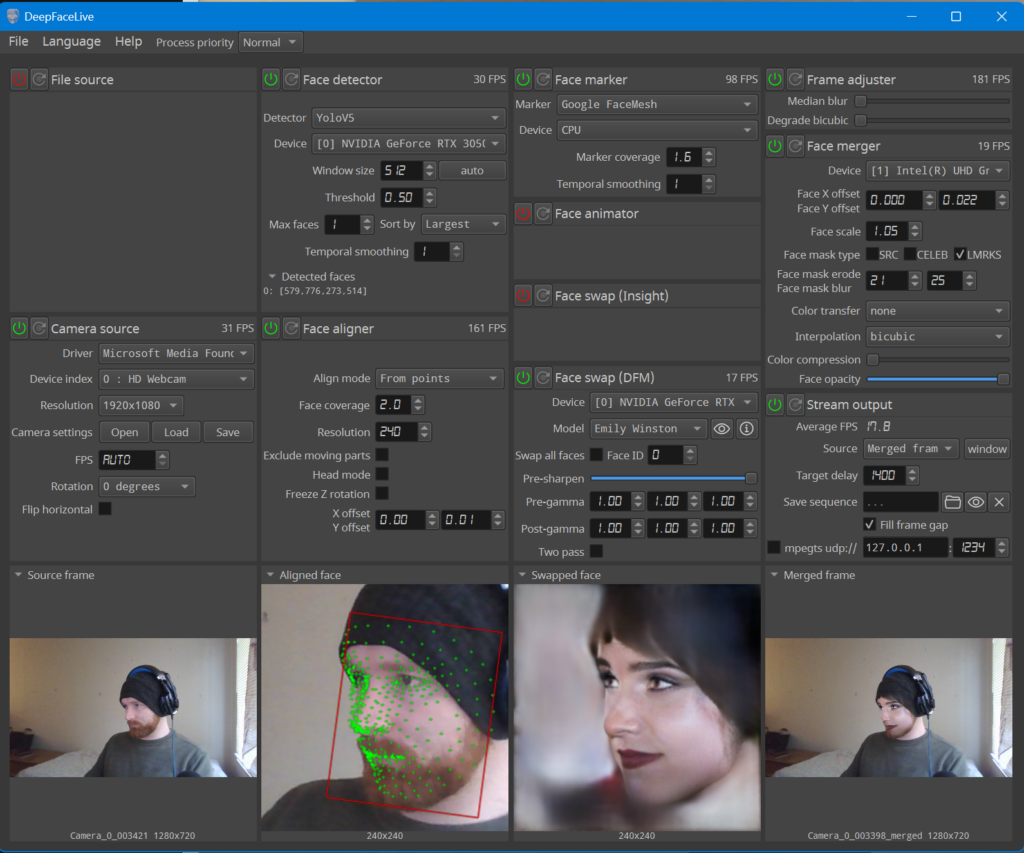
Explaining all of the submenus of the DeepFaceLive interface is beyond the scope of this tutorial and I may do another one later. I will focus on the setting needed to connect the output to OBS studio which you can then connect easily to Discord or another other video call software.
Connecting DeepFaceLive output to OBS Studio
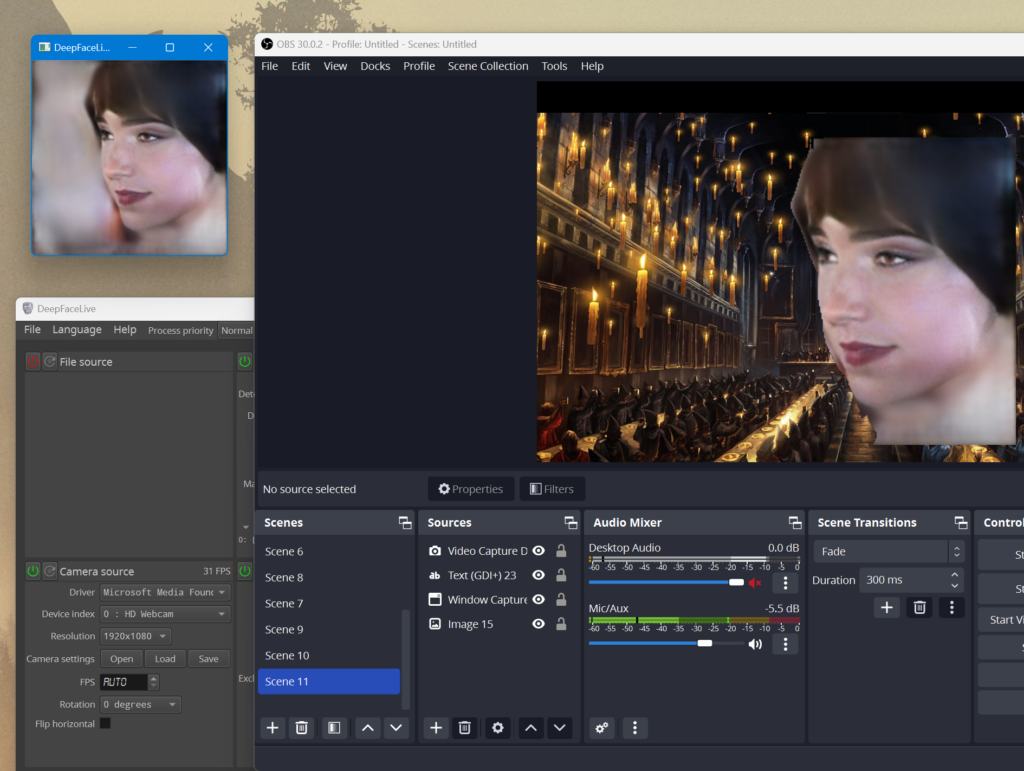
In the “Stream Output” section of the DeepFaceLive interface under “Source” select “Merged Frame” as is shown in the following screenshots


Then click “window” and a real-time display of the complete deep fake will appear. See screenshot below.
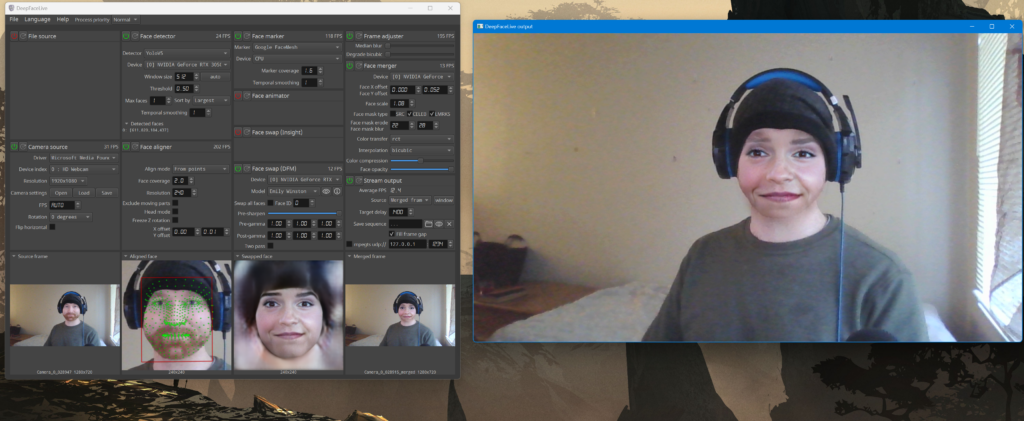
Clearly this deep fake needs some work but you can mess with those settings to improve it. To connect to OBS, use a “Window Capture” within the source selection portion of OBS. In the screenshot below I have “Swapped face” Selected which has a better result.
Install and Configure RVC GUI
The program we will be using for voice changing is Retrieval-based-Voice-Conversion-WebUI which provides a straightforward python interface for Retrieval Based Voice Conversion. Start by cloning the repo. To do this you need to install git . Once that’s done you can open a Windows Terminal and run the following command.
git clone https://github.com/RVC-Project/Retrieval-based-Voice-Conversion-WebUI.git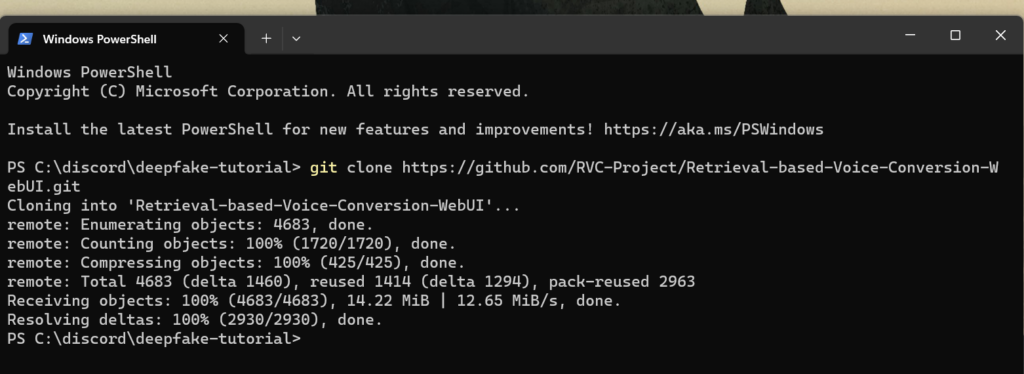
Then you need to make a virtual environment. You might need to google how to install pip and python on your system. These steps are relatively easy. In the same directory that you ran git clone run the following commands.
pip install virtualenv
python -m venv .venv
You should have a directory structure that looks like this

Change execution policy
To be able to activate the virtual environment you will need to change the execution policy on your Windows machine to allow the running of scripts.
Set-ExecutionPolicy -ExecutionPolicy RemoteSigned -Scope CurrentUserNow you need to activate your virtual environment. Run the following command
.\.venv\Scripts\Activate.ps1Then your terminal should look like this.

Now run this
cd .\Retrieval-based-Voice-Conversion-WebUI\
Install CUDA 11.7 and C++ Build Tools
Install cuda 117 from this link and C++ Build Tools from this link.
Reboot your machine. Once that’s done the reopen the shell (so that it shows (.venv)) and run this
pip install torch torchvision torchaudio --index-url https://download.pytorch.org/whl/cu117Then install dependencies from requirements
pip install -r .\requirements.txt
Then you need to download the necessary models
python tools/download_models.pyThen
pip install PySimpleGUI sounddeviceNow start the GUI using this command
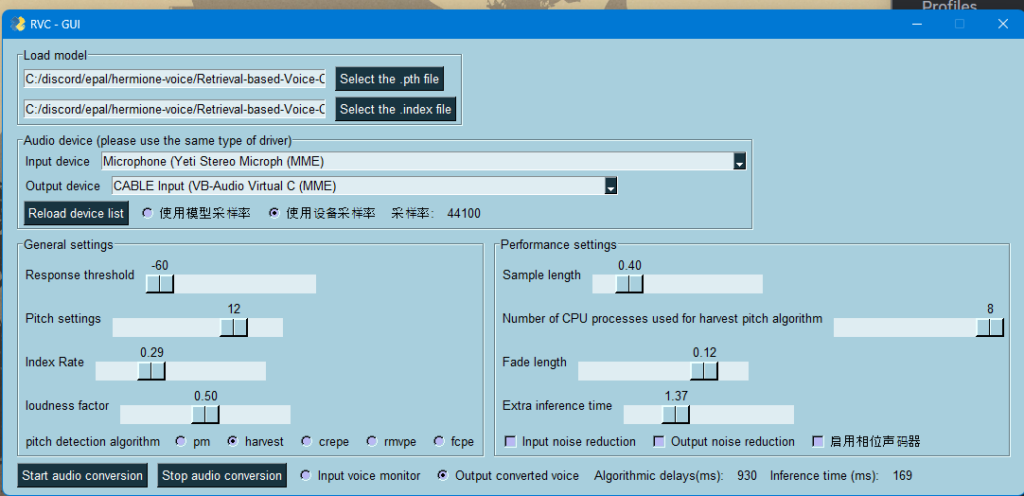
python .\gui_v1.py
If you made completed the previous steps successfully a window that looks like this will appear.
Join AI Hub Discord and download Voice model
Now you need a model to play with. Join the AI Hub discord using this invite link
https://discord.gg/aihubNavigate to the Voice Models Channel. To get the same voice shown in the video find the “E-girl uwu model” Here’s the direct link for the model.
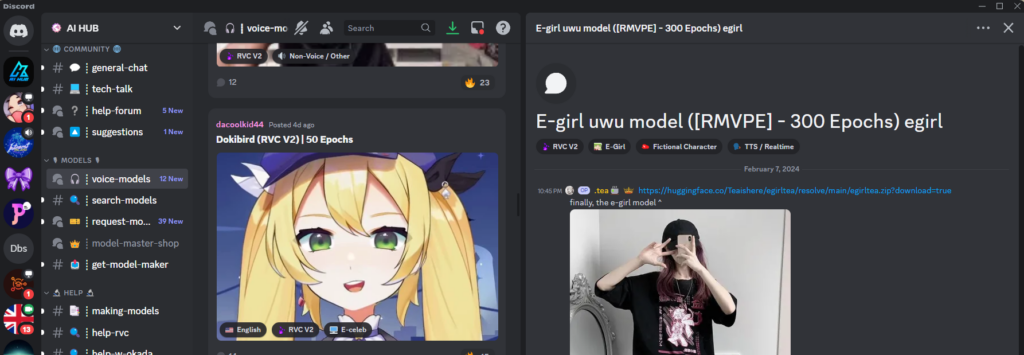
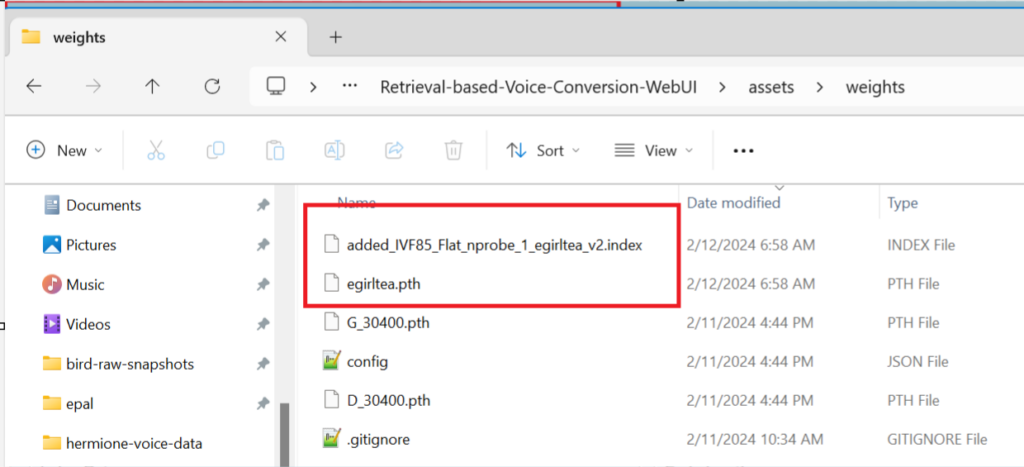
Once you’ve downloaded the model unpack the zip folder into the assets/weights directory. See the following screenshot showing where the files should be unpacked to. Notice the egirl .pth and .index files. Reference screenshot below.
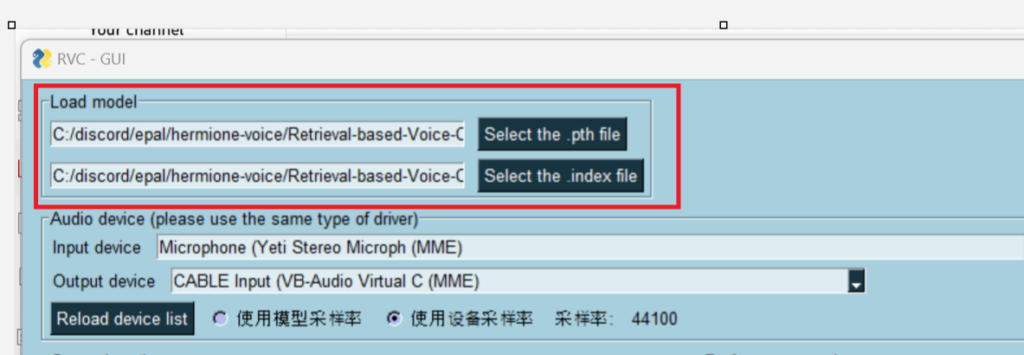
Now, in the GUI select the .pth file and .index file under the load model section. See screenshot below.
Now you are ready to setup the audio system so that you can input audio directly into Discord.
Configure Audio Setup for Discord Input
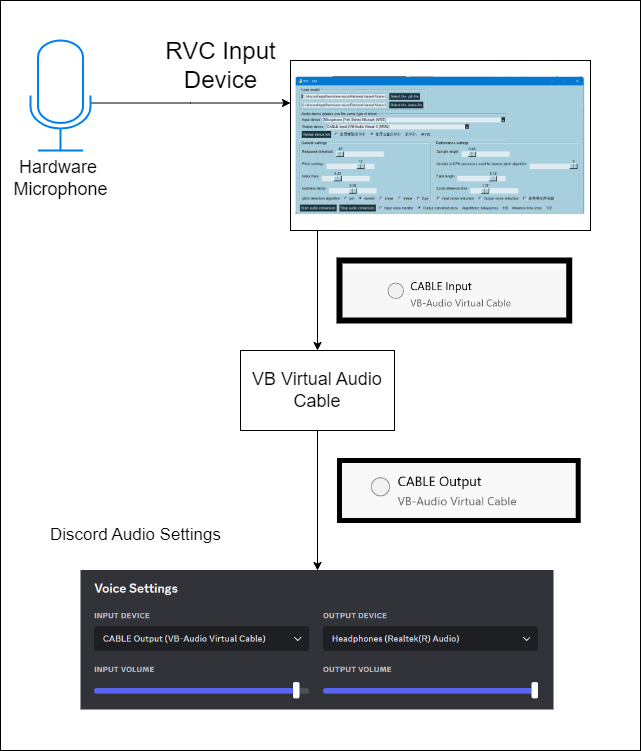
You need to download a virtual audio cable to be able to send your audio into Discord. The following block diagram shows what we are shooting for.
Download Virtual Audio Cable from this link. The following YouTube video will walk you through the setup.
https://vb-audio.com/Cable/Once you have installed VB-Audio Virtual Cable connect your microphone as input to RVC GUI and then select the Cable Input as Output for RVC.

Navigate to Discord and connect your input device as Cable Output. Then choose your normal output as the Discord output device. Make sure to use Discord’s audio testing feature before you start saying hi to your friends 🙂

And that’s it! Congratulations! You are finished. Feel free to contact me for help debugging this if you need help.
Advanced audio processing and feedback
So, once you have the above minimal working version installed the next step is to install VoiceMeter Banana from this link. You will need to reboot again.
In Windows 11, You need to navigate to advanced sound settings. See screenshot below.
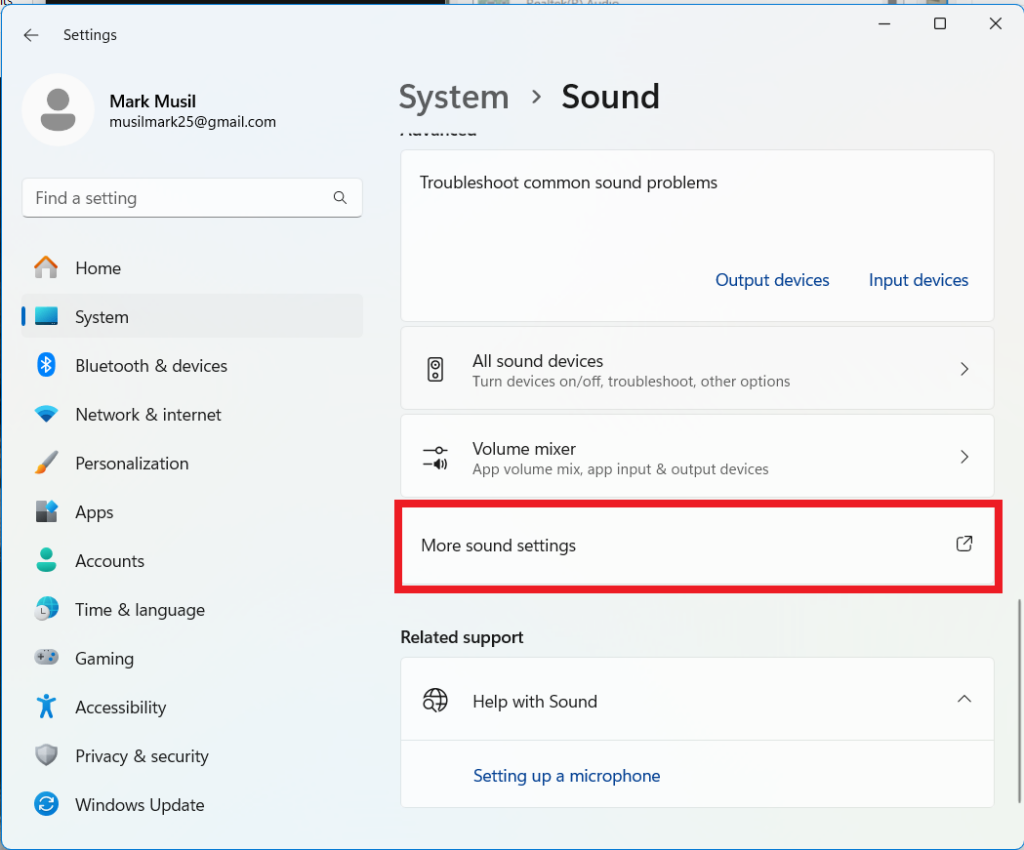
Within advanced sound settings set your microphone as the default input device and select “2 channel 24 bit 48000 Hz”. See diagram below.
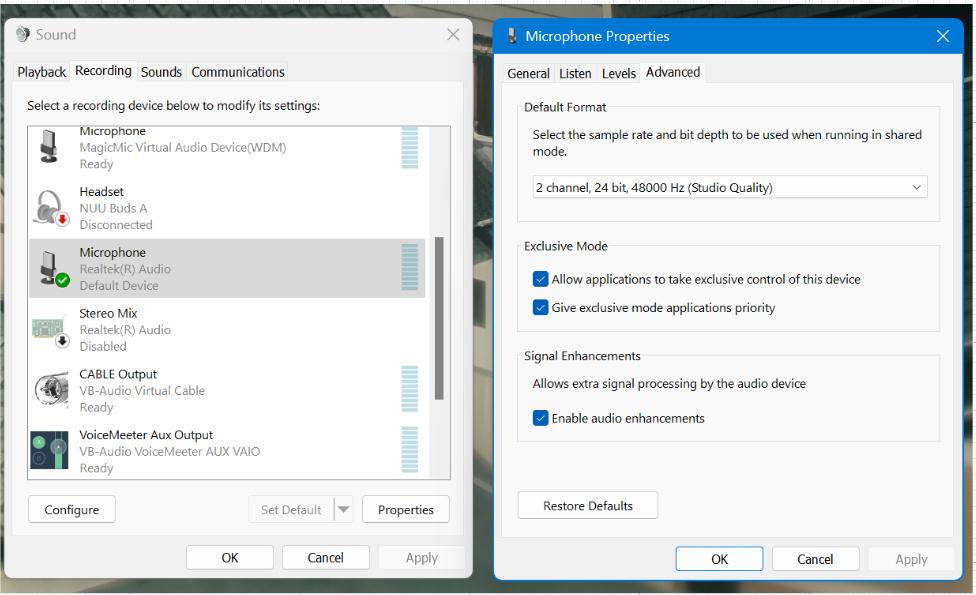
Then do the same thing for your output device but choose VoiceMeter Aux Input.

Now you need to configure audio as shown in the flow chart below.
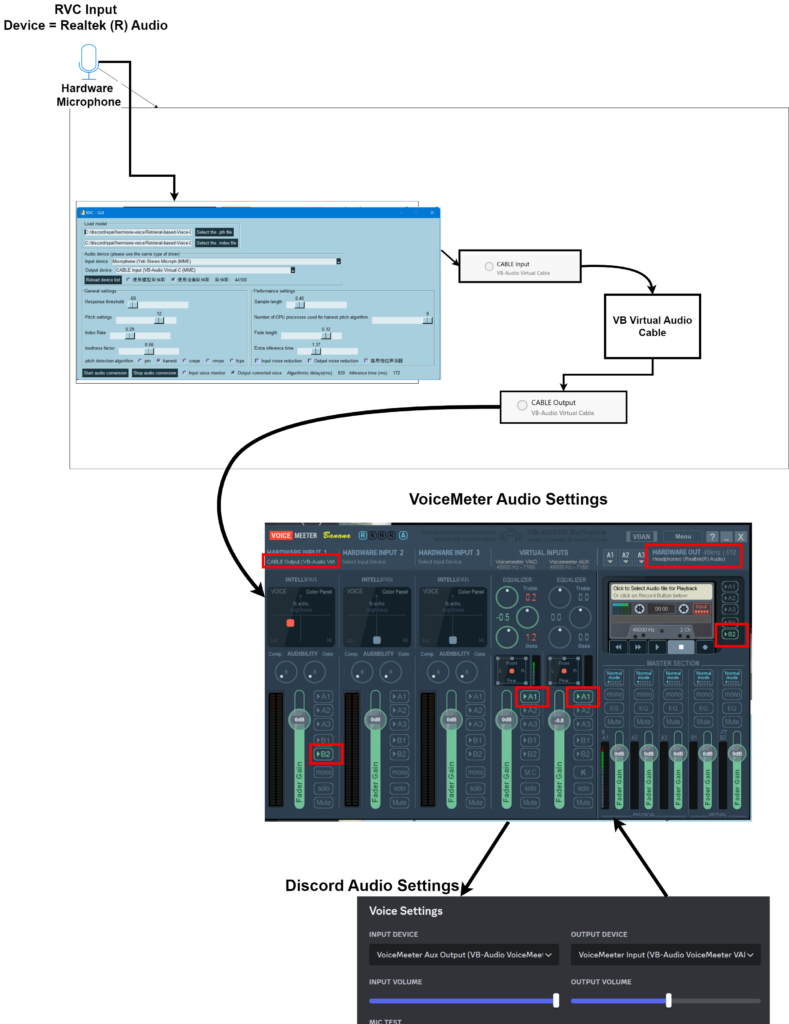
To be able to hear your own voice you need to activate A1 under hardware input A1. See diagram below.
